Manuel Giesinger, the friendly Blogger from grillen-entdecken.de is a true barbecue fanatic. He loves good and high quality meat, simple recipes and above all variety on his grill. He eagerly shares his passion for the barbecue, with a large amount of heart and soul, with all meat lovers and barbecue fans on his informative platform. Of course, not only is it a basic requirement, but it goes without saying that only the best meats find their way on his grill.
Therefore, a look into the topic of ` the aging of meat´, is the obvious conclusion. He was particularly taken by the idea of the preparation of the dry aged meat and the DRY AGER. He is the proud owner of the DRY AGER DX 500. He uses this to age and refine his own meat and keenly shares his results with his followers, as in the report below. He has compiled and elaborately written down all his experiences and tips of the whole maturing process.
The Dry Ager Test: Until now, we have only been busy preparing Dry Aged Steaks that were bought at the butchers. As a Blogger, one is compulsorily forced to try out new things in order to later write about these experiences. Dry Aging is something that has interested us from the beginning. How does Dry Aging actually work? What happens to the meat during the maturing process and how is the distinctive aroma of a Dry Aged steak achieved?
We wanted to take a look into these questions by way of a comprehensive project on how to mature meat and to dry age the meat at home ourselves. The most important tool is a good dry aging fridge.
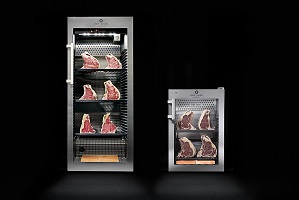
It didn’t take us long to find the suitable dry aging fridge and the Dry Ager was chosen because it’s appearance, fittings and range of functions are more than adequate. The dry aging fridge DRY AGER from the Landig Company comes in two sizes.
The Dry Ager DX 1000 is the larger model and has room for 2-3 hung loins of meat or approx. 100 kgs or different cuts of meat on its shelves.
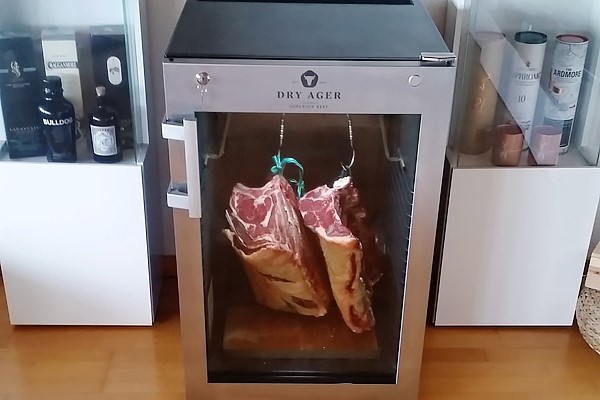
The Dry Ager DX 500 is the smaller model and can hold 2 halves of loin meat or 20 kgs of cut meat.
The Dry Ager DX 500 was more than adequate for our project. And then came the day when our dream became true and the Dry Ager DX 500 was delivered.
In order to judge the taste of our own matured steaks we had support from Marcel Kazda, a top chef from Karlsruhe. He regularly receives pieces of our Dry Aged Steaks, prepares them in his kitchen and judges them with his trained taste buds.
The Dry Ager has now been in use for over three quarters of a year and we have dry aged over 35kg of pork and beef in order to gain experience with this dry aging fridge.
It is about time for a detailed progress report of our experiences and to pass on tips and to propose improvements from the delivery up to the operation of the Dry Ager.
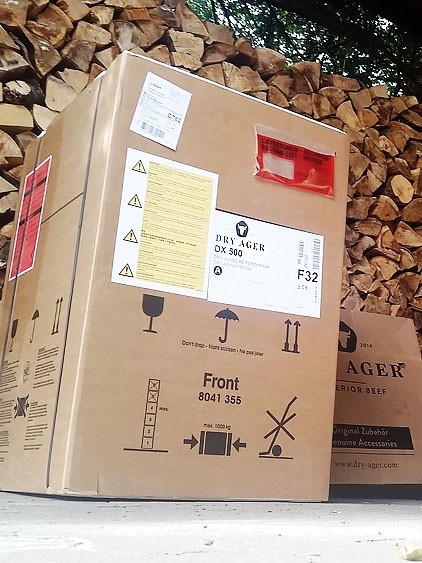
The delivery occurred without any problems, thanks to a delivery date made in advance and a phone call on the day of the delivery from the courier. The Dry Ager was expertly transported and delivered to the front door. The first assessment took place based on the delivery company.
As we had expected and hoped for, we could not find any faults or damages, which could have been caused during transportation. The driver waited patiently and allowed us time to inspect the goods.
Unfortunately, the courier only delivers to the front door. Moving the goods into the flat didn’t prove to be a problem (see assembly instructions ). We were completely satisfied with the delivery and punctuality of the Dry Ager.
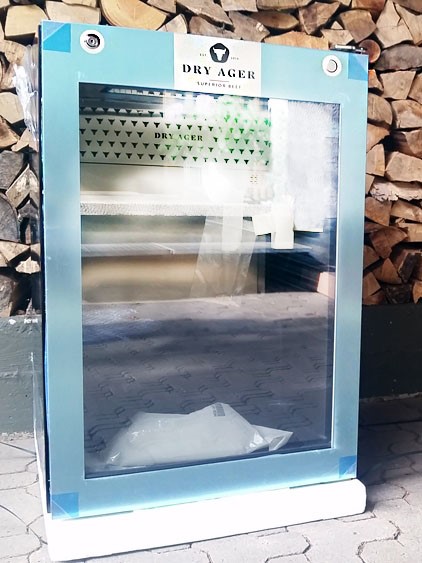
There is a thick polystyrene sheet on top of and underneath the Dry Ager, which are wider and deeper than the Dry Ager itself. This is covered by a large and thick carton and both are bound by thick packaging tape which holds everything together. The door handle is protected by its own polystyrene wedge.
Because of its size, the Dry Ager DX 500 has a stabile stand and the large polystyrene padding protects the dry aging fridge from knocks and falling over during transport. Stainless steel fittings, inside the unit and the glass door are covered in protective film.
We have nothing to criticise about this. Damage can only be caused through deliberate abuse.
The Dry Ager now has to be transported from the front door and into the flat. As we live on the first floor we needed to carry it upstairs. For those who think that the Dry Ager is difficult to manage because of its bulky form, you are mistaken. The manufacturer of the Dry Ager have put a lot of thought into the handling and have built handles onto the back of the fridge. With these and a second pair of hands, the Dry Ager can be carried with ease.
Another advantage of the Dry Ager, if held by the handles and tilted backwards, is that it can be manoeuvred and placed in its correct position. Back in the upright position the Dry Ager is as steady as a rock. There is no doubt that a lot of thought has gone into the construction and testing of the Dry Ager.
There is no correct location for the Dry Ager. You can position it wherever you want. Although the following tips may be useful: because this is an electronic device, it is handy to have a socket close by and it needs to have enough ventilation around it. The Dry Ager comes with a 2m lead, which should be long enough to reach the nearest socket, so no need to use an extension cable. The Dry Ager should be kept out of direct sunlight. Although the Dry Ager has a glass door with UV protection, it is better to be on the safe side. The Dry Ager also has a constant temperature of 1.5° inside the fridge and if the surrounding temperatures are too high, due to sunlight, more power is needed to hold the desired temperature inside the fridge. Our Dry Ager is in the living room. Being where it is, we are able to permanently view it and its contents. We can also conduct tests on noise and light over a long period of time.
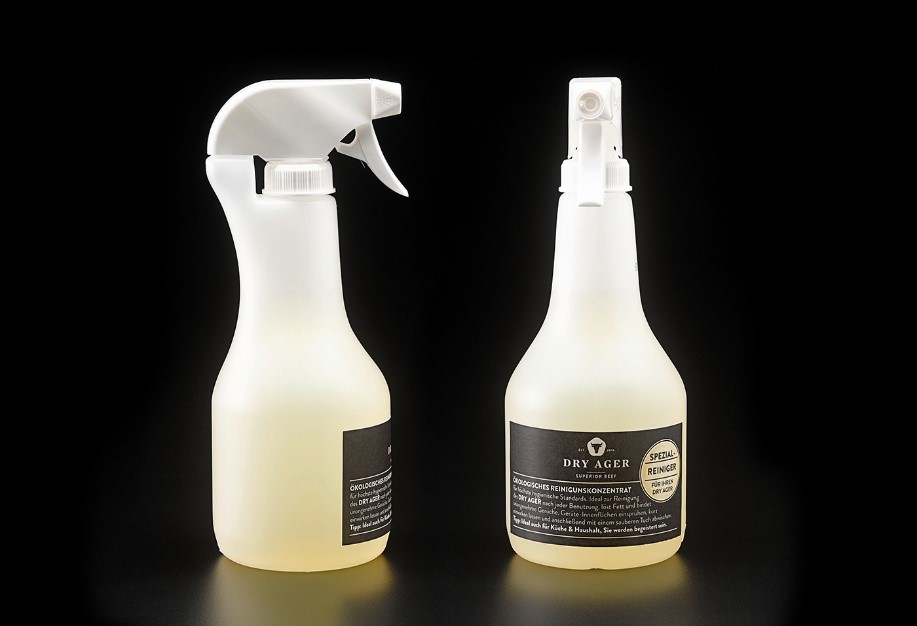
cleaning agents. The enclosed brochure states the importance of using a mild detergent. To be on the safe side, the best thing to do is to order the special cleaner from Landig directly. We sprayed the interior of the Dry Ager with the special cleaner and rubbed it dry with a clean, dry cloth.
We did the same thing with the shelves, the stainless steel hangers and meat hooks. If in doubt, the hooks can be boiled in a saucepan in order to kill any remaining germs.
The Dry Ager is now ready to be used and filled with meat. This also means that hygiene has the highest priority. You should avoid reaching into the Dry Ager, use latex gloves if you have to.
There are a couple of things to keep in mind when choosing the meat, especially when it comes to the quality. Landig hits the nail on the head on its Homepage by mentioning that
the quality of the end result can only be achieved if high quality meat is used in the first place.
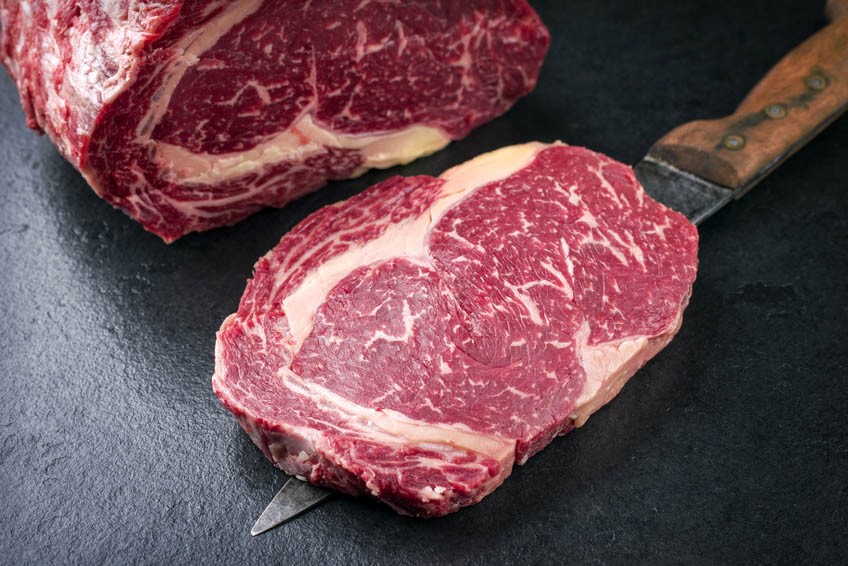
In order to choose a good piece of meat for processing in the Dry Ager, different factors need to be taken into consideration. The correct choice of meat for the Dry Ager begins with the breed, how the animal is kept and the food it is given. An advantage by Dry Aging is when the meat has a thick, protective layer of fat around it and plenty of marbling. Meat from mass production, where the animals are fed to grow quickly, therefore, have hardly any fat and are not suitable at all.
Also important when buying the meat, is to make sure that hygiene standards are adhered to. If, for example, the meat has already been contaminated in the abattoir, this is irreversible. This is where the slogan
the Dry Ager can make fantastic things out of something good, but if the basic product is bad, nothing good can be achieved.
In addition to this, it is also important that the meat is kept in the cold chain until it is hung in the Dry Ager. Therefore, it is advisable to turn the Dry Ager on a day before it is to be used. The meat does decrease in size during the dry aging process, depending on the temperature and humidity setting.
The fridge has been cleaned and the meat ordered from our favoured butcher. Now is the time to start the initial implementation of the maturing fridge. If possible, the Dry Ager should be turned on the day before it is filled with meat, so that it has time to reach the desired temperature and humidity.
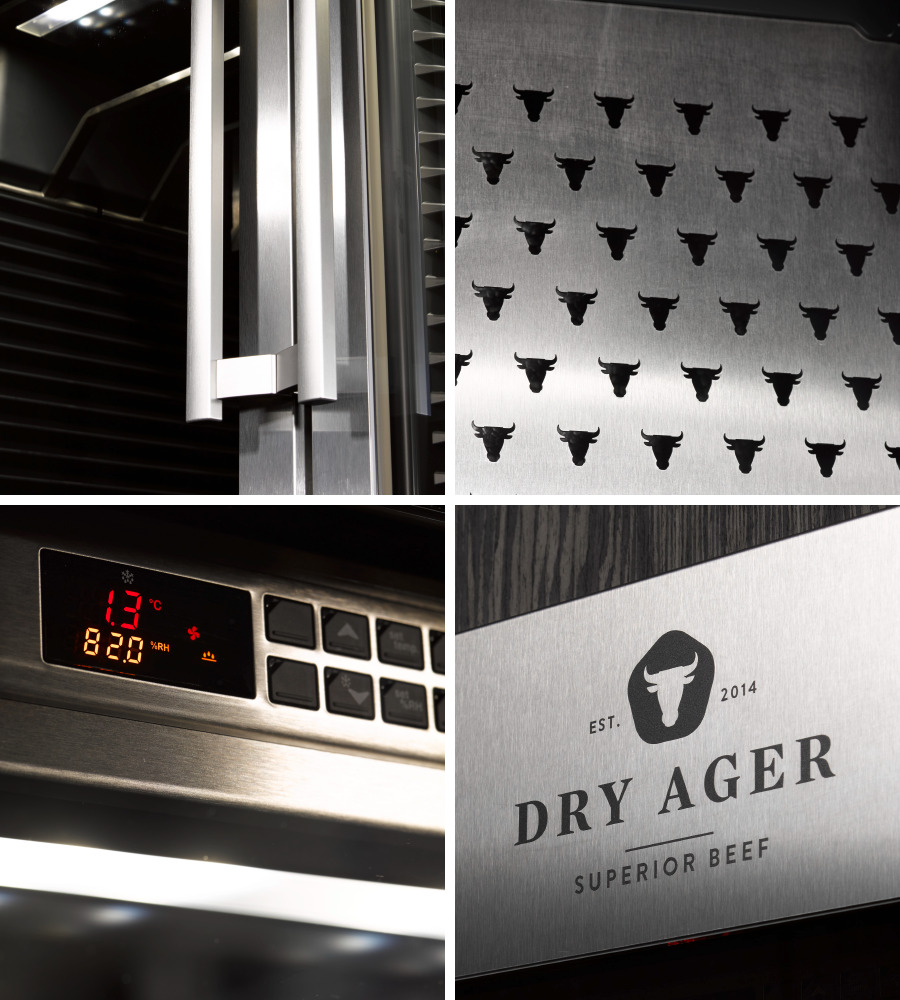
Turning on the Dry Ager is very easy: plug in and press the on button and the Dry ager is ready for use. The display shows the actual temperature and humidity. On initial use, the temperature matches that of the room it is in and then slowly adjusts to the desired temperature.
A temperature of 1.5° and a humidity of 85% are the standard settings for the Dry Ager, which have already been pre-programmed, so nothing needs to be altered.
In order to gain experience and be able to quickly react to a natural disaster, we have read up on how to change these settings. A comprehensive description on how to regulate the Dry Ager is included when delivered. The temperature and humidity regulation using the control panel is very easy and no complicated number combinations are needed.
The LED lighting is also turned on and off with a button in the control panel. What doesn’t work straight away, is the UVC sterilisation lamp. This has to be switched on using a separate code and stays in operation, which we thought was very sensible.
Whilst using the control panel to do something, for example turning on the light, it came to our attention that we could only read the display if the door of the Dry Ager was open. When dry aging for the first time, you feel the need to check on the temperature and humidity on a daily basis, which meant that you had to keep opening the door unnecessarily..
With the DRY AGER DX 1000, the larger model, this problem has been solved. Here you can read the display through the glass door. There is room for improvement with the Dry Ager DX 500. If you don’t want the LED light on for 24 hours a day, there is also a need to open the door. It is difficult to find a solution for this. It is not possible to place a button on the door frame, as this can be inter-changeable and it wouldn’t look very good. Maybe a hidden light switch on the side of the Dry Ager would be a good idea, but as the Dry Ager is similar to a fridge and has on outer casing and you probably wouldn’t be able to use a side switch, this is only a partial solution. Which leaves us using a remote control to set the lights.
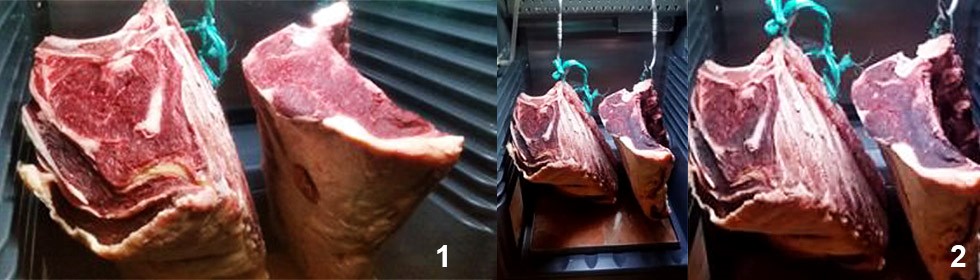
After obtaining our saddle of beef, which had been cut in half and hung according to the instructions of the Dry Ager, the excitement began. You could see a change in the meat on a daily basis. It became dryer, darker and it started to slowly form a crust. The smell of the meat changed early on, which left us in a growing pleasant anticipation of the finished aged meat.
Day 1
The saddle of beef, a Hohenloher heifer was bought from Brath butchers in Karlsruhe and hung in the Dry Ager. The beginning of an exciting and rewarding project.
Week 1
The meat had changed noticeably within the first week. It became darker and dryer.
Week 2
After two weeks the meat had a lovely dark colour and also a dry crust was clearly to be seen. Also the aroma in the Dry Ager matched that of dry-aged meat.
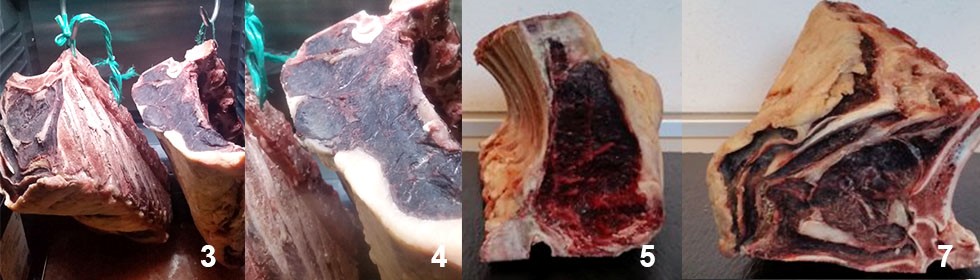
Week 3
The transformation of the meat had slowed down considerably. It had a rich dark red colouring. The crust was firm and hard. This prevents the meat from losing any more moisture and stops it drying out.
Week 4
This was the last week for the smaller of the two halves of meat. This will be taken out in Week 5 and cut into beautiful steaks. We are very curious to find out how well the meat cuts using a butchers saw and meat cleaver.
Week 5
The saddle including the T-bone and sirloin was taken out of the Dry ager and cut, or sawn, into large steaks. The smell was mouth watering. The crust was firm and underneath it was deep red meat. We cut the meat into 5 steaks, each 4-5cm thick, three were vacuum sealed and frozen. The other two went straight onto the barbecue. The rest of the beef containing the Rib-Eye was left to mature for another two weeks.
Week 6
This week there were hardly any visible changes to the meat. 5 weeks is normally the ideal length of time to age beef. You can leave it for longer, but the changes and the improvement to the flavour are hardly noticeable.
Week 7
As in the past few days, there was little change in the meat. Now was the time to take the second piece of meat out of the Dry Ager.
We noticed that the Dry Ager was able to constantly hold the set temperature and humidity throughout the whole aging process. Due to the built in automatic defrost function there was a rise in temperature every now and then, but never rose above 2.9°. It was very comforting to see how precise the Dry Ager was.
Finally we come to the sounds made by the Dry Ager when in use. We are pleased to say that here the noise level is low and compares to that of a fridge. A low `humming´noise can be heard, which didn’t bother us, bearing in mind, our Dry Ager was in the living room.
The only thing that sounded odd for beginner was a faint clanging noise when the defrost function melted frozen drops of water which fell into the drainage gutter. Every now and then there was a small `cling` and then it was quiet again.
From the delivery right up to the start up, the Dry Ager DX 500 completely satisfied our expectations. The delivery was easy, the packaging strong and prevented any damage during transportation. The carrying and moveability within ones own home was made easy through the, well thought out, carry and roll system.
It is pleasant and comforting to see, that extensive thought has been put into the planning of this machine and a solution found for every eventuality.
Not only the aesthetically pleasing appearance, but also everything about this machine convinced us. The pre-programmed temperature and humidity settings made a quick and easy start possible. You don`t have to spend a lot of time reading the instructions for use or find out the correct aging conditions.
The Dry Ager DX 500 basic settings of a constant temperature of 1.5° and a humidity of 85% produced perfect steaks. We are definitely going to keep to these settings when we continue with our project. The Dry Ager functioned superbly, worked constantly and proved to be top quality.
Even the taste of our own Dry Aged steaks satisfied us and had the typical flavour of a dry-aged steak. The meat had a wonderful, intensive taste with a nutty and buttery flavour.
That is the reason why top chef Marcel Kazda judges our Dry Aged steak as:
Very good. You can taste the strength of the beef and it has an unobtrusive, pleasant dry-aged flavour.
We are already planning our next comprehensive tests with the Dry Ager. At the moment, a 6kg US Porterhouse steak and a Tomahawk steak from Spain are hanging in the Dry Ager. We are also going to try and see what happens to cuts of meat without much fat, such as filet, flank or Tri-Tip. Also on the list waiting to be tested are game, ham and cheese.
We would like to say a huge “thank you” to our co-operative partners, who have supported us and will do so in the future.

CUISINE CRAFT CO.,LTD
188/6 Supalai Premiere Ratchthewi Building, Petchburi Road, Thanon Petchburi, Ratchthewi, Bangkok 10400